

Few are aware of the advantages of free SMTP server services for sending emails.
It may be the best solution for those who are unable to use their SMTP servers provided by internet or hosting providers, in addition to those who face various problems because of the ability to deliver email.
In this tutorial, we will cover how to use the SMTP Gmail server, and you will also find detailed information on how to use it to send emails via PHP Mailer and through a WordPress Plugin.
Benefits of using an External SMTP service
Although most hosting companies, such as Hostinger for example, and ISPs offer SMTP support, there are some benefits to using an external SMTP service, such as:
- They can guarantee greater email delivery capabilities.
- You won’t need to install your own application (if using VPS).
- Your emails are less likely to be listed as SPAM.
Free Google SMTP upload limit
Google limits the output of 100 emails per day. If you reach the limit, you will not be able to send emails for the next 24 hours until you reset. More information about Google’s email limits can be found here .
Before you begin, you will need:
- Gmail or G Suite account.
- Access to your hosting control panel.
1st Step – Configure SMTP Gmail server
First, in order for us to use Gmail’s SMTP server services, you need to allow access to less secure applications.
Google has started blocking apps and devices that, according to them, do not meet current security standards. However, access to less secure applications can be easily activated here.
Below you can see the SMTP Gmail details:
- SMTP server : smtp.gmail.com
- SMTP User : your Full Gmail User (email), for example: [email protected]
- SMTP Password : your Gmail Password.
- SMTP port : 587
- TLS / SSL : required.
If you want to take advantage of the IMAP protocol and store emails sent in your Gmail folder, just follow the steps below:
- Log in to your Gmail account and go to Settings.
- Now go to the Routing and POP / IMAP tab and activate IMAP.
- Click the Save Changes button at the bottom of the page once everything is selected.
2nd Step – Use Google SMTP
In this step, we will learn how to use the free SMTP Gmail services to send emails using a PHP Mailer and WordPress plugins. Knowing how to send PHP email is very useful when learning to code or if you just want to add a contact form to your website.
Option 2.1 – Use PHP Mailer
There are many PHP email scripts available. In the example below we will be using PHP Mailer :
- Open your PHPMailer repository on Github and download the script by clicking on clone or Download → Download ZIP . Save to your computer.
- Upload the file to your hosting account. You can use the FTP client or the file manager provided by your hosting provider. If you don’t know how to send the files to your hosting account.
PHP Mailer already has a configuration file named gmail.phps for use with Gmail SMTP servers. Located in the PHPMailer-master / Examples folder .
- <? php
- date_default_timezone_set ( ‘Etc / UTC’ ) ;
- require ‘../PHPMailerAutoload.php’ ;
- // Create a new PHPMailer instance
- $ mail = new PHPMailer;
- // Tell PHPMailer to use SMTP
- $ mail-> isSMTP ( ) ;
- // Enable SMTP debugging
- // 0 = off (for production use)
- // 1 = client messages
- // 2 = client and server messages
- $ mail-> SMTPDebug = 2 ;
- // Ask for HTML-friendly debug output
- $ mail-> Debugoutput = ‘html’ ;
- // Set the hostname of the mail server
- $ mail-> Host = ‘smtp.gmail.com’ ;
- // use
- // $ mail-> Host = gethostbyname (‘smtp.gmail.com’);
- // if your network does not support SMTP over IPv6
- // Set the SMTP port number – 587 for authenticated TLS, aka RFC4409 SMTP submission
- $ mail-> Port = 587 ;
- // Set the encryption system to use – ssl (deprecated) or tls
- $ mail-> SMTPSecure = ‘tls’ ;
- // Whether to use SMTP authentication
- $ mail-> SMTPAuth = true;
- // Username to use for SMTP authentication – use full email address for gmail
- $ mail-> Username = “[email protected]” ;
- // Password to use for SMTP authentication
- $ mail-> Password = “yourpassword” ;
- // Set who the message is to be sent from
- $ mail-> setFrom ( ‘[email protected]’ , ‘First Last’ ) ;
- // Set an alternative reply-to address
- $ mail-> addReplyTo ( ‘[email protected]’ , ‘First Last’ ) ;
- // Set who the message is to be sent to
- $ mail-> addAddress ( ‘[email protected]’ , ‘John Doe’ ) ;
- // Set the subject line
- $ mail-> Subject = ‘PHPMailer GMail SMTP test’ ;
- // Read an HTML message body from an external file, convert referenced images to embedded,
- // convert HTML into a basic plain-text alternative body
- $ mail-> msgHTML ( file_get_contents ( ‘contents.html’ ) , dirname ( __FILE__ ) ) ;
- // Replace the plain text body with one created manually
- $ mail-> AltBody = ‘This is a plain-text message body’ ;
- // Attach an image file
- $ mail-> addAttachment ( ‘images / phpmailer_mini.png’ ) ;
- // send the message, check for errors
- if ( ! $ mail-> send ( ) ) {
- echo “Mailer Error:” . $ mail-> ErrorInfo;
- } else {
- echo “Message sent!” ;
- }
- Contact GitHub API Training Shop Blog About
In order for this script to work together as the Gmail SMTP server, edit and change some settings like username, password and email recipient address.
Rename the files from gmail.phps to gmail.php so that it is accessible via the browser. You can use the same file manager or FTP Client to rename and edit files with their details.
Now, open the script in your browser. If you uploaded the PHPMailer-master folder to Public_html , the file must be accessible via the link http://yourdomain.com/PHPMailer-master/exemplos.
If everything is set up correctly, you should receive a success notification, indicating that the email message was sent successfully.
Option 2.2 – Use SMTP WordPress Mail Plugin
The easiest way to use an external SMTP in WordPress is to use the WP Mail SMTP plugin .
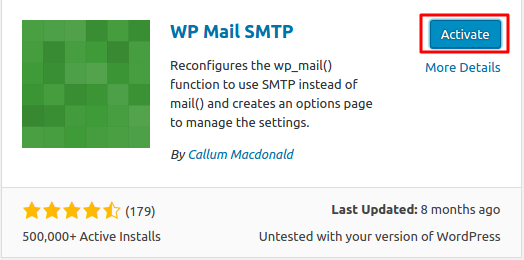
First, access your WordPress admin panel and go to the Plugins > Add New section . Install and activate WP Mail SMTP.
Now access the WP mail SMTP settings by going to Plugins -> Installed Plugins and clicking Settings.

You will need to fill in all the necessary details for your SMTP server.

- SMTP Host – Enter smtp.gmail.com .
- SMTP port – Default Gmail SMTP server port is 465 for SSL and 587 for TSL.
- Encryption – It is always recommended to use encryption. Choose according to the port you specified.
- Authentication – Select Yes, as SMTP authentication is required.
- User – Gmail address.
- Password – Gmail password.
To save changes, click the Save the Changes at the bottom. To ensure that your settings are working correctly, you can test by sending an email to your personal email address. Enter your address and click Send Test .

If you receive your email sent, it means that email sending is working correctly. However, if you receive any error messages, please check your email settings again or contact our Customer Success for assistance.
Conclusion
You learned how to set up your Google account and use SMTP Gmail server services for free, and how to send emails via PHP Mailer.